How to Manage Blog Content with the Most Important Tool
Learn how to manage all your blog content with Trello by following these steps!
If you could manage all of your blog content in one tool, would you do it?
Well, I found the tool and it’s free. And I’ve been using it to organize blog content for some time now and let me tell you it is the best cms for a blog.
Adding a board of all of your blog posts in Trello is necessary.
You are able to quickly grab that URL when needing to share.
You can have copy ready for when you do share that URL.
And you can have a running list of tasks that you need to do for that specific post.
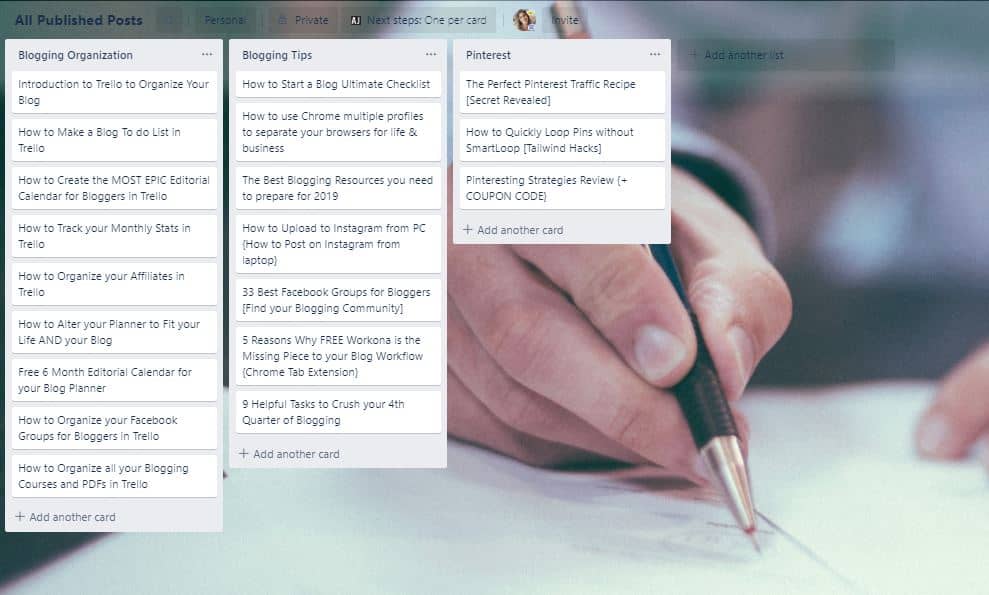
I add each post to my “All Published Posts” board after publishing them.
Don’t forget to PIN this to your favorite Pinterest board:
What is Trello?
Trello is the tool you’ll use and say to yourself, I wish I would have known about this when I first started my blog.
It’s blog-life changing!
If you’ve never heard of using Trello for your blog, here is an introduction to Trello video:
How to Manage Blog Content with Trello
Step One- Create an “All Published Posts Board” for blog content management
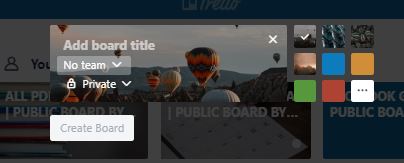
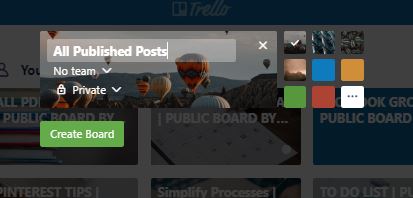
Create a new board in Trello
Click on the right plus sign and select Create Board
Name your board “All Published Posts”
If you’d like, you can change the background image on your board (these steps are in the video above)
Step Two- Create Lists Based on your Categories
If you have multiple silos/ categories you’re going to want to separate those to be able to more easily find your posts.
If you blog about one thing, see how you can separate what you blog about into categories.
Step Three- Fill in your Blog Post Titles
Under each list, start listing the names of your blog posts.
The easiest way to do this:
- Open WordPress
- Select All Posts
- Filter by Category
- Copy & Paste into your cards in Trello
Step Four- Add URLs and details to each card
This is the most tedious task but it is worth it!
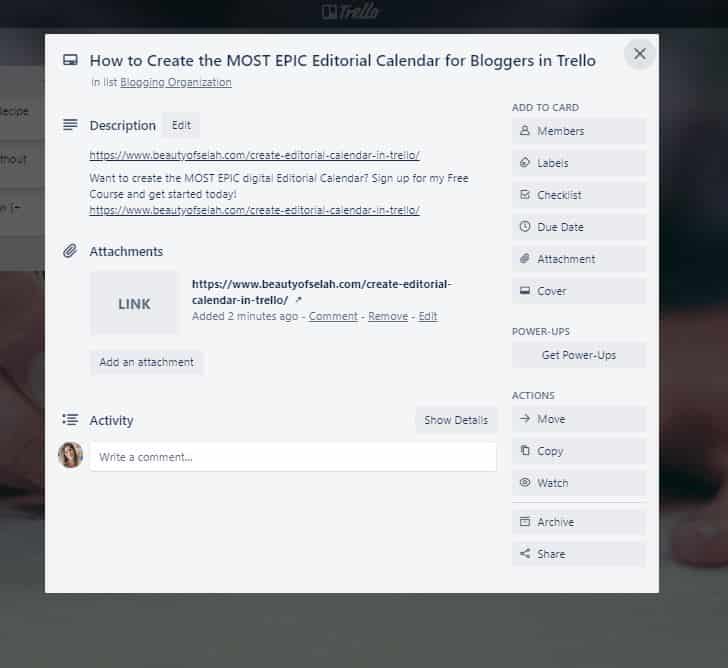
Open up your cards one by one by clicking on them to add details.
Copy your URL for each post by going back into WordPress and selecting “view” under the post title on your “All Posts” Page.
Sidenote Tip to save you time– If you have a mouse with a wheel, if you hover over a link and click the wheel it’ll open up that link in a new tab. If you’re a tab addict like me, I teach a way to organize tabs too.
When pasting your URL into the card, click out of the “Description” Box so that it pastes as a clickable URL detail.
Then paste your URL also in the description box.
I also like to add some copy for when I share my URL in Facebook Groups. (If you’d like to see how I leverage Facebook Groups for Blogging click here.)
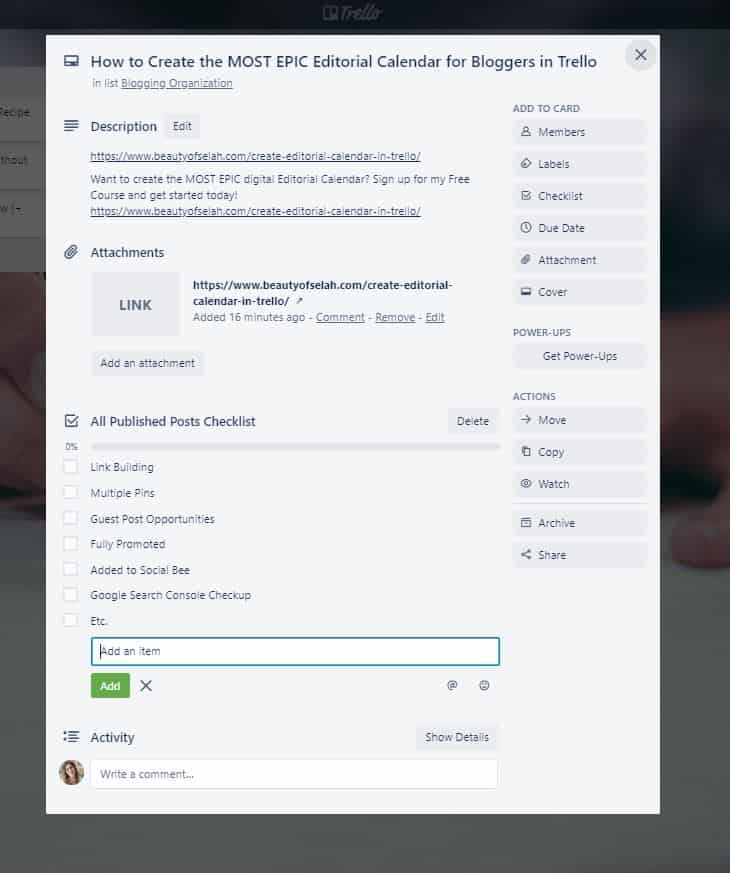
Step Five- Add a Checklist to each Card
What I love about Trello Checklists is the simplicity of them. You can create one checklist and then add it into each card.
- Select Create Checklist
- Name that Checklist All Published Posts Checklist
- Fill in that Checklist with what needs to be done for each post (this is unique to you)
In your next Card:
- Select Create Checklist
- Select “All Published Posts Checklist” from the dropdown menu so that it will populate the checklist in your card.
This checklist is unique to you, but I’m showing you some of mine to inspire you.
It is always best to build links to each blog post. I’ve learned about that through Stupid Simple SEO and Easy Backlinks for SEO.
I create multiple pins for each post, and if the post isn’t performing well on Pinterest I create even more.
For help with Pinterest, you can check out my Free Pinterest Tips Trello Board.
I have a promotion checklist in Trello, to learn how to make your own including other blog processes check out my Create, Simplify & Streamline your Blog Processes in Trello Course.
I use Social Bee to schedule my Social Media Content.
I also update my posts for SEO using Google Search console.
Step Six- Add Labels to your cards
If you can’t tell, there are so many options in Trello to be organized…and I like to use as many as I can.
The video at the top of this post shows you how to create labels.
Here are the labels I use for my cards so I can quickly see what needs to be done:
I add labels by using Trello shortcuts. You can also click on a label and it will expand all the labels to give the details of them.
Step Seven- Add this step to your workflow
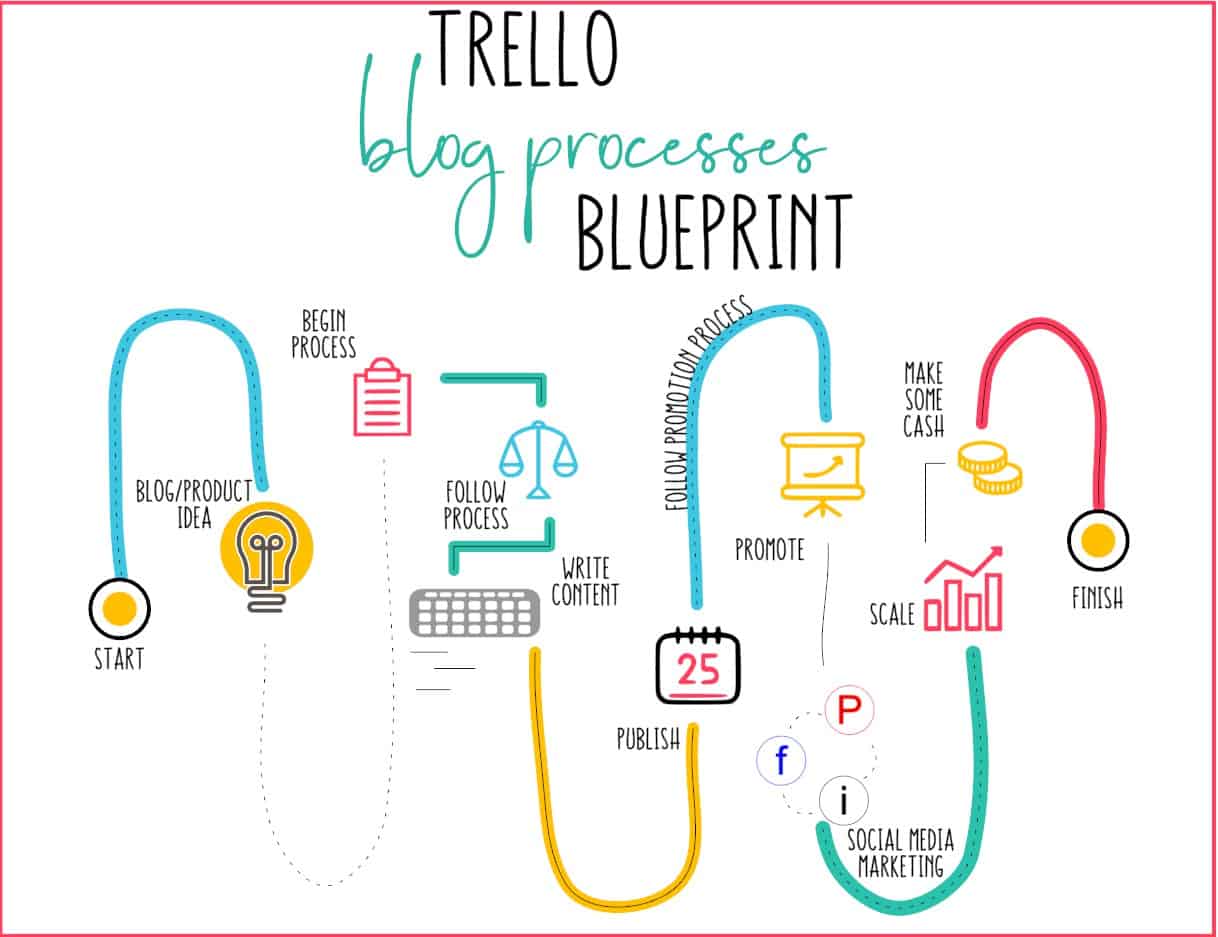
If you don’t already have a workflow for when you create a blogpost I explain how to create one in Trello in my Blog Processes course!
You can check out how to:
- Create your Blog Post Workflow
- Create your Promotion Workflow
- Create your Pinterest Workflow
- Create your SEO Checklist
- Create your Monthly Email Process
- BONUS: A Trello board that includes all the processes.
Check out the course here:
Conclusion
Trello is capable of handling all your blogging needs. I love managing all of my blog content in it.
For more Trello tutorials and Blogging Organization Tips check out my Blog Organization Category!
And if you’d like to begin organizing your entire blog sign up for my FREE 5 Day Blog Organization in Trello Boot Camp!






Thank you, Elizabeth! This is very helpful. Boy, have I got work to do!
Thanks Mary!
This is an amazing post. I have been battling with organizing my pins, content, drafts etc but was not happy with Google sheets. I have used Trello when writing individual posts but you have just made me aware of what a powerful tool it is. Thank you for sharing.
No problem Poovanesh!
Fantastic article! I’ve been using Trello to keep track of online courses that I’ve either finished or am currently enrolled in, as well as my freebies and printables, with details about where and when they are posted. Extending that to include ALL my posts is just a genius idea!
I hope it helps you get more organized!
Elizebeth, once again you’ve knocked it out of the park with this Trello board. I spent a fair amount of time creating my new published posts board, and I love it! I can see so many ways I will use this! Thank you!
So glad to hear this! And no problem! Trello is the best!