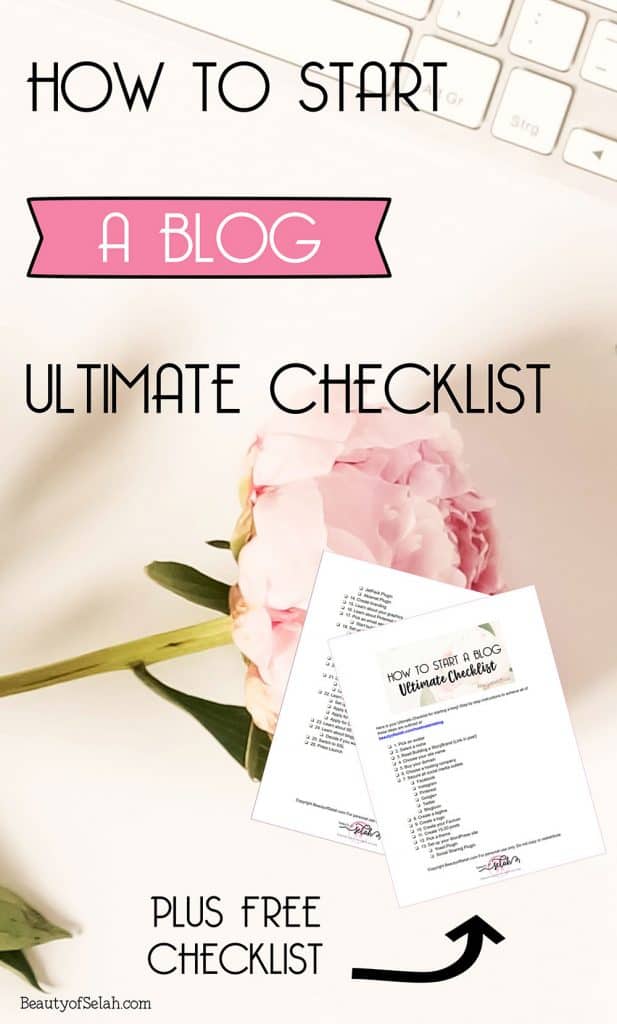
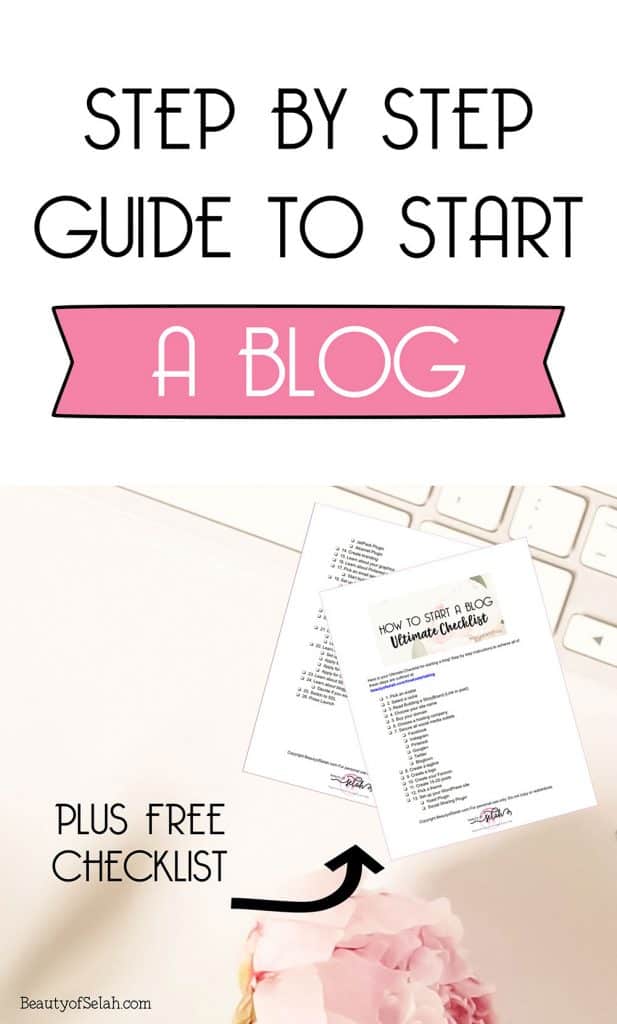
How to Start a Blog Ultimate Checklist
I’m going to line out everything you need to do. I’ll tell you everything I know as if I was helping my bestie start her blog- minus the information I’ve learned through paid courses of course. But I’ll link to those if they’re worth it.
In this guide you’ll see that these are not all resources from me, you’ll need to click links so that you can get the best information and then you can come back here and continue on down the list.
A lot of people are in a rush to have a live site so they skip a lot. Then they have to go back and get it right. Some even scrap their site and start over with a new name and new tagline.
Now, this is no guarantee you won’t do that because blogging changes. And as your blog grows and you see what your audience responds to you may want to change it. But I do believe this will help you start out on a better foot than if you hadn’t read this guide.
I’m still going back to fix everything. So let me help you not make my mistakes.

1. Before you learn how to start a blog, pick an avatar
What’s an avatar? It’s your audience, encapsulated into one person. So, think of who you want to write to, who you want to help. Give her/him a name and figure out everything there is to know about their life. What do they like to do? How much money do they make? Do they work? Did they get a higher education? What about their past? What are they searching for in life? And how can you give them the tools to find it? What is their name?
Here’s a link from one of my favorite resources Pro Blogger, to help you create your avatar:
My avatar’s name is Clara. So if you’re reading this heeeeeeeey Clara!
2. Select a niche
Alright now that you know who you want to write to, what do you want to write about? Do you want to write about one thing? Or do you want to write a lifestyle blog and have multiple categories in your blog like mine? I blog about travel, family, Christianity, homeschool, blogging, and creativity. Each of those could be their own niche, it’s completely up to you. Your blog, your rules.
Side Tip-
Create a new email address. Yes, set up one for your blog but also a separate one. You’re most likely going to sign up for LOTS of emails, “How I made $xxxxxxxx,xxxxx in 10 days” “How I got xxxx,xxxx pageviews in 5 months” etc. Although I would advise that you don’t need to read most of these emails or sign up for them, everyone does.
And they clog up your email, so having a separate email for just these that you sign up for will definitely come in hand.
3. Read Building a Storybrand
Ok so you have your avatar, you have your niche, you should jump right into buying your domain right? Nope. If I would have known about this book, and I wish I had, I would have read it first. This book is gold. It will help you build your story, your brand. How you write your blog posts, how you write on social media. All of it. This will help you with almost every aspect of your blog. Trust me, read the book. Grab it here:
4. Choose your site name
Ok, so you’ve read Building a StoryBrand right?
I’m just making sure because if you have, you’ll most likely be confident in what you want to write about and how you want to write.
Because a lot of times, people jump in with buying their domain name and then have to change it later once they figure everything out. I don’t like wasting money.
Before you buy, google it. Does it already exist? Are the social media handles taken?
So if you love your name, buy it. If not, think about it until you’re confident.
Side Tip: Should you use your name as your domain name?
You can. I do want to say though, that your site name influences Google. We’ll get more into this later but for search engine purposes, it’s easier to be seen if your site name reflects your niche. It’s not impossible to be seen with a domain name the same as your name. It’s just something to think about.
5. Once you have your site name, it’s time to buy your domain.
If you are just writing to write and never intend on monetizing your blog then you can always create a blog on wordpress.com. However, this post is definitely about monetizing, so I highly recommend getting a wordpress.org site.
I bought my domain through Bluehost, I believe it’s about $12 a year. You can check to see if the domain name you want is available here:
6. Choose your hosting company
A lot of bloggers will suggest you use Bluehost, but I cannot do that. As a beginner, I fell for that trap and had a horrible experience along with almost anyone who uses them.
I currently use Bigscoots as my host, I highly recommend them and or you can use Siteground.
Siteground
If you’d like to use Siteground you can sign up here:

BigScoots
You can sign up for Bigscoots hosting here:
7. Secure all social media outlets
You don’t need to be active on any of these right now. But you do want to secure them as yours. The main ones you want to secure are Facebook, Instagram, Pinterest, Google +, Twitter and Bloglovin.
Join my Facebook group:
8. Create a tagline
What’s a tagline? It’s usually one sentence or a short phrase that sums up what your site is.
I’ve read and heard so many times that you have THREE seconds to make an impression on someone who clicks to your site.
So when someone lands on your site, do they know what it’s about?
Or do they have to search for who you are and what you do?
If someone comes to your site, has no clue what you’re about, chances are they’re going to leave.
A tagline is a perfect summary of your blog, make sure to include it with or by your logo, front, and center on your site.
If you read Building a Storybrand, then it will definitely help you create your tagline.
9. Create a logo
Now, this is fun, or at least it was for me.
If you’re creative and you know how to work some software like photoshop, get to work!
You can also use Canva for graphics. Or just pay someone to make it for you. Remember, you have 3 seconds to make an impression. Make sure your logo is clear, crisp and to the point.
Most people use Fiverr to get their logo made. You hire designers to create what you want and pay them a low price (it’s named Fiverr because you can pay $5 for a logo, but there are also higher priced designers).
10. Create your Favicon
You know when you go to a website and there is a graphic at the top left of your tab? That’s a favicon. If you want to look professional, you need one. Here’s a guide by Raelyn Tan on how to create one.
11. Create 15-20 posts while building your site honed in on helping your avatar.
Can we talk about your blog posts really quick? I’m sure you have lots to write since you’re starting a blog. But I want you to write content that will be seen. (If you never plan to monetize your blog you can ignore the next few sentences.)
You need to ask yourself everytime you start writing, what value am I giving my avatar with this content?
Are you writing about yourself? Because unless you’re a public figure, I’m not sure how interested people will be. Your content should bring value to your audience.
Are they gaining wisdom from this blog post? Are you solving a problem for them? How are you helping them?
My suggestion, although you can do what you want (your blog your rules) is to write 15-20 posts before launching your blog.

12. Pick a theme
I read something somewhere that before you pick a theme you should look at it every day for a couple of days to make sure you love it. I did that and I loved my theme. But I made a huge mistake.
I didn’t check the credibility of the theme developer.
I got my theme and when I launched I had so many problems.
And the worst one? My site was so slow. And I didn’t have time to look for a new theme.
Until I just couldn’t take it anymore. So I landed with this one and I love it. Plus it’s completely customizable.
My theme is called Soledad by ThemeForest they have over 6k WordPress themes to choose from.
13. Set up your WordPress site
Ready to get technical? It’s not that hard. The amazing thing about a WordPress site is not having to do any coding. When you purchase your theme, it should come with installation instructions, set it up and tweak it to your liking!
Add your logo and tagline and voila.
Just kidding, this is a pretty daunting task.
You will probably be changing your site a lot. That’s the beauty of a blog, you can change it to fit your needs whenever you’d like.
Sidenote -Plugins
The less you have the faster you’ll run. Do not, I repeat, do not download a million cool plugins on your site. Get what you need and keep it to a minimum. Here is a great plugin resource with step by step instructions by iMarkinteractive.
14. Create your branding
What colors would you like to use for your site, graphics, and pins? They don’t all have to be the same, but you want to be branded so that when someone comes across your graphics, they know they belong to you. They love your content so they’ll click on it.
Here’s a quick guide from Layered Indulgence on how to brand your blog.
15. Graphics…graphics everywhere
Graphics are now one of my favorite parts of blogging. Can you trust me when I say you need them? There are 3 main ways you’ll use them in your blog.
1. Your header image
When someone lands on your blog post, your header image is the first thing they’ll see. It can be a picture with no text that sums up your blog post, it can be just text, or my fav- a picture with text. It’s up to you, and it’s part of your brand. You want your header images to be different but also cohesive.
2. Inside your blog posts
Adding media to your posts increases the “scrollability” (I know that’s not a word, but you know what I mean) of your posts. You can add more than just images, you can also add video. It keeps your reader interested in your content.
3. Your Pinterest graphics
This is SO important. DO NOT, I repeat, DO NOT publish a blog post without a vertical Pinterest image. There are many ways you can get traffic to your site, for a beginner blogger and even for older blogs, Pinterest plays a huge role in your traffic.
We’ll dive deeper into this in the next point.
Where do you get pictures from?

Depending on what you blog about, you can usually use stock photos for your graphics.
You can get free stock photos from sites like unsplash.com, I always suggest taking a screenshot when you’re downloading a free stock photo so that you have proof of where you got it from.
Never. Ever. Ever download pictures from google and add them to your site. That’s completely illegal and you can be sued. You want to make sure that any picture you use, you have commercial rights to use it.
You can also use paid stock photos. I’ve purchased a few from my blog.
My favorite stock photo site is pixistock. Her style is amazing.
Check out PixiStock for your stock photo needs here.
If you’re a food blogger or DIY blogger, using stock photos for your creations is not a good idea. You’ll need to learn how to use a camera. You can get started on an intro DSLR like this Canon Rebel.
Where do you make graphics?
Lots and lots of people use Canva! It’s free and so simple to use. Some people use Photoshop or other graphic design software. It’s completely up to you and what you’re comfortable with.
16. Pinterest Images
Alright, this is super important so we’re going to just park here for a few.
Remember how I said graphics in your post help people scroll? Creating a pin for your post kills two birds with one stone, it helps you get traffic and puts an image in your content.
So, you’ve written a blog post and publish it and then what? How do you get people to find it? Pinterest.
But they’ll never find it if you don’t create a pin to go with your post.
Don’t be stubborn, please don’t skip this. Trust me, it’s important. Make at least one pin for ALL of your posts.
Need help creating graphics? I took this free course by Apple Cart Lane when I realized that my pins sucked. (I’m not putting that lightly, they were horrible). Her course helped me out SO MUCH. I can’t recommend it enough.
This is such an important topic we’ll dive deeper into Pinterest traffic later on.
17. Pick an email service provider
I have heard it said over and over again, that your email list is your most prized possession. Social media can change, Pinterest can crumble, but your list is YOURS. People sign up because they want to hear from YOU. And you need to make sure that you can email them.
I won’t stumble around this one, don’t use your current provider. Sending emails through Gmail or Yahoo is completely unprofessional.
If you can’t afford to pay for a service provider, you’re in luck. There are plenty of free providers out there.
I personally use MailerLite. They’re free for the first 2k subscribers and then pretty cheap after that. Plus their customer service is amazing.
If you want to opt for a paid provider so that you don’t have to switch later then the most recommended that I’ve seen are ConvertKit and Drip.
UPDATE: I have since switched to Convertkit and LOVE it! I’d recommend Convertkit over Mailerlite.
Start building your list now.
Whichever provider you choose, you’ll want to create at the very least a sign-up form so that when someone comes to your blog they have a way to sign up to hear from you.
Even if you only have one person on your list, they don’t know that. Make sure to send them a newsletter. Build a relationship with your audience.
How often should you send a newsletter? It’s up to you. Some send one every day, some send some whenever they feel like it. My advice- be consistent and try what works for you. I send a newsletter once a week.
18. Set up your basic pages
1. About me page
Let your audience know who you are and how you can help them! Here’s a great tutorial by Melyssa Griffin on how to write an about my page.
2. Privacy Policy Page
You need a privacy policy page. When someone visits your site, your site collects information about them. And your audience needs to know that their information is safe. If you download the GDPR framework plugin, it creates a Privacy page for you.
3. Disclaimers Page
Your disclaimers page is mainly to make sure you inform your audience that they cannot copy your content, and also where you inform them of your affiliates. You’ll want to link to your disclosure in all of your blog posts that have affiliate links.
Here’s a tutorial on how to write a blog disclaimer by Raelyn Tan.
4. Your 404 Error Page
If you ever have a broken link on your site, your reader will be redirected to a 404 page. A lot of people put something general on this page but I want you to maximize this opportunity.
Someone clicked a link to your site and got to this page. They were interested in something you had to say. So I say, use this space to add links to your most popular content. And tell them where your search bar is so they can find what they were looking for.
If you don’t have a 404 page that comes with your WordPress theme, you can download a plugin.
5. Contact Page
This doesn’t have to be extravagant when someone comes to this page they have one goal. To contact you. Make sure you have a contact form and if you don’t want to be contacted for anything specific, to disclose that.
19. Google Analytics
Setting up Google Analytics is a critical step in your blog. You want to do this before you launch. This is how you see how many people visit your site. And it’ll come in handy later if you want to apply for bigger ad networks.
Here’s a tutorial from Google themselves on how to set up Analytics.
When you have that set up you want to make sure that your Analytics are not tracking your own views. So you’ll want to exclude your personal IP address. If you use multiple devices to access your site, make sure to add all the IP addresses.
Here’s a tutorial, again from Google on how to exclude internal traffic.
20. Google Search Console
Google Search Console helps Google index your site, which will help with your Google ranking in the long run. This is not something you should skip. Google Search Console will also help you identify errors on your site.
Here is a tutorial from Yoast that walks you through setting up Google Search Console.
Once your site is set up there, you need to add your sitemap.
Here is another tutorial from Yoast to add your sitemap to Google Search Console.
21. Gaining Traffic

This is an important topic, so we’re going to park here, for a while.
I heard somewhere that writing content is like 30% of the work, promoting it is 70%.
You write your content and publish it online obviously for people to read it right? But where do those people come from?
If you’re just starting out, the answer is simple. Pinterest.
Get a Pinterest Strategy
Pinning for pleasure, which I’m sure almost everyone has by now, is completely different from pinning for business.
There is a lot that goes into it, and for good reason- it pays off. So there are two different ways you can pin, you can choose to do one or the other, or even both. But let’s break them down.
Using a Pinterest Scheduler- Tailwind
Tailwind is an online tool that schedules your pins out for you. Meaning you load them into your schedule, set it and let it do the work. It’s an amazing tool. But if you’re not making any money with your blog yet, I’d say to start by manually pinning because once your free trial with Tailwind expires, you have to pay $15 per month to keep using it.
Here is a link to a free trial of Tailwind.

Manual Pinning
This is by far my favorite strategy. I have to warn you though, it’s a little time consuming if you don’t have a plan or a strategy.
After spending a lot of money on Pinterest courses, there are three that I would highly recommend for manual pinning. I haven’t found an all-inclusive Pinterest Strategy course. But these three break down into one amazing strategy.
The first is Pinteresting Strategies by Carly Campbell. ( Use code pinning5 to save $5) She teaches how to use your best-performing pins to accelerate your traffic. And boy, does it work. (Side note- I thought it wasn’t working because I did it for like two weeks and wasn’t seeing results, Pinterest takes a little while to catch on. Just wait and see.)
The second course I’d recommend is Pin Signals by PotPieGirl. This course teaches you how to set up your pins for their best possible chance on Pinterest.
The third is The Pinterest Launch plan by Jennifer Maker. This gives a step by step guide on how to launch all your pins on Pinterest and have them build momentum! It works wonderfully with the other two courses I recommend.
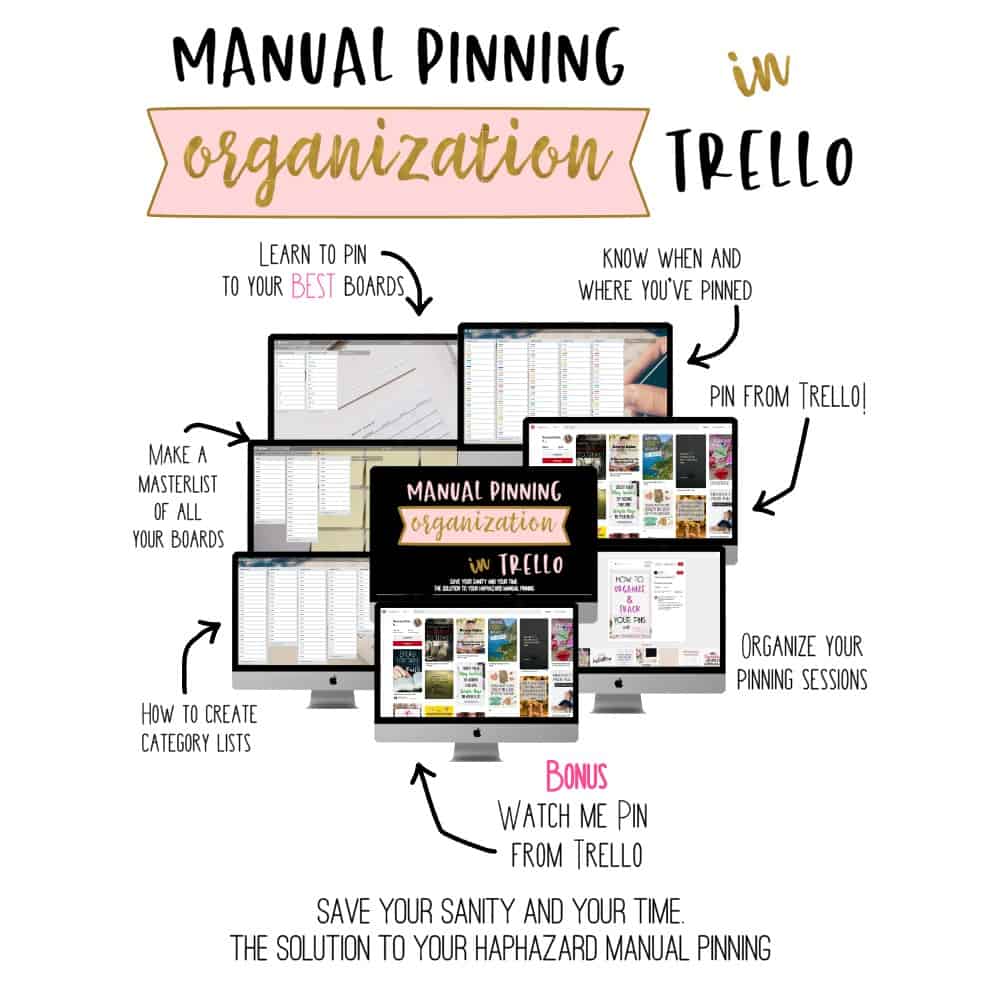
Manual Pinning Organization
So when I started pinning, I have to admit, it was a mess. I had no idea what I was doing, whether I was being effective or spamming boards. And since I spent so much time pinning, I was overwhelmed and frustrated because I had no rhyme or reason to what I was doing.
I looked for a way to organize my pins, and couldn’t find anything. So I created my own method. I shared it with a friend and my mastermind group and recognized it could help anyone who manually pins. So I created a course.
You can grab the Manual Pinning Organization in Trello course here.
Group Boards
Group Boards on Pinterest are boards with multiple pinners added to a “group”. And they all pin a certain topic to the board and then share each other’s content. It’s an amazing way to gain traffic.
There has been much debate lately on whether or not you should add yourself to group boards because of announcements from Pinterest. If you are just starting out, I believe Group Boards are crucial to gaining momentum on Pinterest.
Your audience is small, but if someone sees your pin on a Group Board and repins it to their large audience, you have the potential of gaining some massive traffic. My course also helps you identify whether your Group Boards are beneficial and which ones you should pin to.
Pinterest Algorithms
Like I said, pinning for pleasure vs pinning for business is completely different. You are relying on a third party company to send traffic your way. And Pinterest is, how should I say this, sometimes unstable. You could have steady traffic one day and then Pinterest changes its algorithm and you have a sudden drop.
My top piece of advice for Pinterest is to give it time, give it a chance. Any new Pinterest strategy you use could take a while to make a difference- sometimes that means weeks.
My second piece of advice, Pinterest is not owned by you. The only thing you own is your list. While Pinterest may bring you traffic, your email list is still the most important because it’s yours and it’s not subject to any changes.
Social Media
Pinterest is not the only platform to get traffic from. There are so many social media platforms that can drive traffic to your blog. However, let me be clear, Pinterest is the most important. Other social media platforms take lots of time and effort and like to charge you to get your content in front of people. Pinterest is free.
Let’s break down the main social media outlets and how they can bring you traffic. I suggest starting with what you already use, one or two at the most so that you’re not spreading yourself thin.
Facebook used to be a super easy traffic gain. But like most businesses, Facebook wants to make money. Which means their algorithms are set to not bring traffic to links unless they are promoted. It takes some serious work to get views from Facebook.
What I’ve learned is that if you post a few posts without links that have engagement and then make a post with a link, you’ll get higher engagement that way.
However, I’m not a Facebook expert. But I know of one!
You can check out Rachel Miller’s Facebook page here for tips and tricks to grow on Facebook.
I used Instagram a lot before blogging. So it was pretty natural for me to use it for my business. However, I had barely any followers or any engagement for a long time.
Depending on your niche, Instagram my not be beneficial for you. I would check out other bloggers in your niche and see if they generate traffic and/or sales from Instagram
I never used Twitter before I blogged, and I’m not far enough to invest time into it, so I can tell you with full confidence, I know nothing about Twitter.
And that’s ok. Because I know someone who does.
Join the Twitter 1k Followers in 10 Minutes a Day challenge by Saira Perl!
22. Making an income from blogging
There are three main ways to earn an income from blogging. You can choose to start with one, or all of them, totally up to you. Let’s break them down:

Ads
Everyone, including me, suggests adding these to your site once it’s live so that your audience will be used to them while reading your content instead of building an audience and then all of a sudden you have ads everywhere. There are two main ad networks to start with:
Google Adsense
Google Adsense is what almost all bloggers use when they begin their blogging journey. I like Adsense, you can create custom ads for your site and also exclude ads being shown. For example, I have a Christian website, I’m sure you can imagine all the things I don’t want to be advertised on my site.
Medianet
Medianet is by yahoo. And it is calculated differently. Totally up to you who you choose to go with.
Your ad income depends on your traffic. So full disclosure, unless you have people coming in droves to your site right away, you’ll most likely be making nothing to pennies a day. Don’t be discouraged. And don’t compare yourself to others, aim to be better month after month, compare yourself to your last month stats. This is a marathon, not a race.
Mediavine
The real money for ads comes when you get to 25k sessions a month. Then you can apply to an ad network called Mediavine. They seem to be the most respected ad network out there. And instead of making pennies, you can actually make dollars a day depending on your traffic.
This is your goal. There are other major ad networks also, and depending on your niche you may want to go with others. But from what I’ve heard, Mediavine is the way to go.
Affiliate Marketing
Affiliate marketing is just genius. You put links on your site to other people’s products and get a commission.
If you’d like to learn all about Affiliate Marketing I recommend Carly Campbell’s Affiliate Marketing for Bloggers course.
There are three main affiliate networks that I would highly recommend.
Amazon Affiliates
Amazon is insanely easy. You sign up, you ad a link that flows into your content and people buy because they already trust Amazon. They have products for what I would assume every niche. The payout is only 4% but Amazon is the easiest affiliate program in my opinion. You can also sign up as soon as your site is launched and start adding links right away.
Sign up here for Amazon Affiliates. (make sure you sign up right before or right after your site launches, they have a requirement that you have a certain amount of purchases to be made within a certain amount of days to stay active in the program)
You can join Amazon Affiliates here.
ShareASale
ShareASale is a huge affiliate company. Companies add their affiliate programs to Share A Sale and you sign up for them. You can search for companies in your specific niche to sign up for, fill out a quick application and wait for an approval. Super easy, plus it keeps your affiliate companies all neatly in one space.
You can sign up for ShareASale here.

CJ Affiliates
CJ Affiliates is another huge affiliate company. It has the same concept as ShareASale. Some companies are only on CJ Affiliates while others may only be on ShareASale. I suggest signing up for both.
You can sign up for CJ Affiliates here.
Your Own Products
Being able to create and sell your own products should be a huge goal for you. If you have an audience, that means that they are interested in what you have to say. And if you can create a product that helps your audience then it brings so much earning potential for your blog.
Don’t believe me? Check out this article by Brandon Gaille on how bloggers who make the largest incomes actually make an income.
23. SEO
SEO is a league of its own. It stands for Search Engine Optimization. In plain terms, your posts need to be optimized for Google to crawl around in them find out what they’re about and put them in front of the people searching for them.
SEO is a long-term game. And it’s always beneficial. Are you going to be rewarded for it right away? No. But when you are rewarded, the traffic pay off can be amazing.
So how does it work?

Everything in your post, including your site domain, is taken into consideration when Google ranks your post on their site. You don’t need to be an expert in SEO when you start. But if you gain some knowledge as you go it’ll always be beneficial to your blog
I mentioned the Yoast plugin earlier, that plugin is amazing for helping with your SEO strategy. You can add your keywords to it so that Google knows what they are. You can also add a meta description to your posts, meaning when people find your posts on Google, you can customize the snippet of information they see below your link.
My favorite course for SEO is Google Pleaser by PotPieGirl. I have no clue how she knows so much, but all of her courses are dynamite.
24. Should you take a blogging course?
Should you take a course? There are courses everywhere!
As a person who has bought countless courses, I’d say yes. But be careful what you buy.
Before I launched my blog I bought a course that promised me everything I hoped my blog could do. And then I realized this
girl had no clue what she was talking about. So before you buy: check if they have proof of whatever they’re teaching.
How to check out a course before buying
You first want to look at their stats. You can look up their website stats on free sites like SimilarWeb and Alexa. Just enter their site address and see the traffic that comes to their blog.
If they are selling you a course about blogging, then they most likely have an income report or two on their site. Check it. Are they saying they can teach you how to make 100k in a year and they made $30 last month? Then run.
Check reviews. Google their course and see if there are any reviews anywhere, and read them.
Reject fomo. My amazing blogging friend told me about fomo. It means fear of missing out. You’ll see a course and you have x amount of days until you can’t save or can’t buy it anymore. Ain’t nobody got time for that. But it works. Just make sure to investigate the course before you buy.
Courses I recommend:
You can see all of my course recommendations here on my Blogging Recommendations page.
Genius Blogger’s Toolkit
GBTK is amazing. It’s for new and longtime bloggers. It always has multiple courses for all aspects of your blog. And what’s even better is the price. My Manual Pinning Organization in Trello Course is a part of the October 2018 bundle, so if you’d like to save on my course while also grabbing some other amazing courses make sure to grab it!

Pinteresting Strategies
I know I’ve mentioned this course before, but it is worth mentioning again. For such a cheap price it unlocks an amazing secret to manual pinning. Grab Carly’s Pinteresting Strategies here. (Use code pinning5 to save $5)
Niche Post Conversion Strategies
This course is a gold mine. It shows you how to make a post earn $500 a month. It’s easy to implement and explained thoroughly. Check out PotPieGirl’s Niche Post Conversion Strategies here. She’ll explain it all to you.
25. Switch to SSL
Here’s a mistake I made. I thought I had researched enough but I missed one. This is something you should definitely do before you launch. SSL means making your site secure. So when people go to your site they don’t get an error message from their web browser telling them to click away because your site isn’t safe.
It’s a simple change from “http” to “https”. And through Bluehost and Siteground it’s free. Just chat with them before you launch and ask them to switch over your site.
When I did mine, it was in the middle of a post unexpectedly going viral, Bluehost messed up the switch and redirects and my traffic fell dramatically because of the errors. If I would have had it taken care of before launching, it wouldn’t have been a problem.
26. Press Launch
Play the three-second game. If you landed on your site would you know what it was about in 3 seconds? If so, and if you feel ready, take a deep breath and press launch.
Bonus Tips
Podcasts to listen to
ProBlogger Podcast by Darren Rowse
Marketing School Daily by Neil Patal
Just Keep Blogging by Kim Anderson
Facebook Groups to Join
My own group The Organized Blog Society:

You can check out 33+ Facebook Groups to join here.
Free Resources to help you grow your income
I don’t remember where I stumbled across this article, but this is amazing if you’d like to add some content to your blog to make money. In fact, I think this would pair perfectly with the Niche Post Conversions course.
Check out this article by Mike Pearson on How he Made $95,000 in affiliate income last year.
Am I saying you’ll make 95k? Nope. But this is a great way to add some income!
Click here to see all of my recommended resources!
Conclusion
I wanted to create a detailed outline to start a blog the right way. I wish I had known all the information upfront and so I wrote this so that anyone and everyone can know what they’re getting into. But not only arm you with the steps you need to take but lay out how you can accomplish them.
Make sure you check back here, I’ll continue to update this post with more great info, and sign up for my email list for great blogging tips!
Are you starting a blog? I’d love to know your niche! And when you launch, add you link in the comments so I can check out your blog!

Related Posts:
How to Finally Have the Best Manual Pinning Organization in Pinterest
Introduction to Trello to Organize your blog
The Best Blogging Resources you need to Prepare for 2019



What a comprehensive post! I agree with you fully on Siteground and Mailerlite. It does blow my mind how quickly Pinterest shifts the ground under bloggers. It seems like a sinking sand to build upon. Pinning for later, great info.
Thank you Rosemarie! And yes, Pinterest is and I’m pretty sure will always be a love/hate relationship lol!
I wish I knew this when I started my first blog. Now that I have a new one that use too this all came more natural to me and I felt more ready before I launched it.
That’s why I wrote this! It seems like in order to get most of this information you have to dig everywhere for it or pay for it lol! I just wanted to lay it all out!
Hi, this is such a great post. I have heard people speaking about avatars and all, but never understood what they are talking about. Thanks you have simplified the complex blogging initial steps to such a beautiful experience to enjoy. Sara@ preciouswomb.com 🙂
Thank you Sara! So glad I could helo!